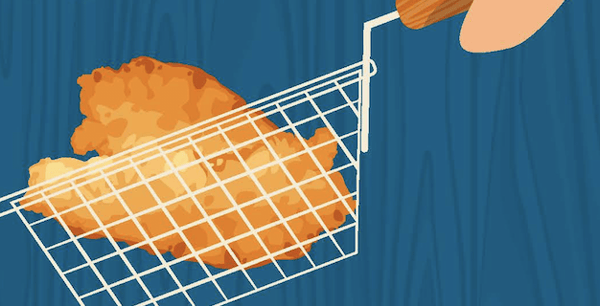
Make top-quality deep-fried food by following these simple steps.
Correct frying techniques enhance fried indulgences
Fried foods are some of the most craveable, popular items on any restaurant menu. When cooked correctly, they’re piping hot, wonderfully crisp, never greasy and always receptive to sauces and condiments.
Yet the fried food lineup on many menus sometimes gets short shrift because the act of plunging food into hot oil seems so simple. Chefs who respect their fried items disagree, saying great fried foods result from well-executed systems. If any steps are neglected, food quality suffers and oil life decreases.
“Anybody who thinks frying is just a drop-it-and-go job isn’t doing it right,” says Michael Landgarten, owner of Bob's Clam Hut in Kittery, Maine. Fried foods make up the core of his menu, necessitating a dozen fryers and multiple cooks to operate them. “We’re fanatics about clean oil, about correct temperatures, about getting as little of our coating into the oil. If we don’t do all that and more, we get bad food.
Choose the correct frying oil
Fryer oils aren’t one-type-fits-all products. Some impart flavor while others don’t.
Some have high smoke points, others lower. Some are better for frying proteins, others
for vegetables. Chefs must take care to choose a frying oil that:
- Suits their flavor and texture aims.
- Is durable enough for extended use.
- Performs well at temperatures that best cook the food.
- Is affordable within food-cost parameters.

Get systems in place
Next comes establishing trainable, trackable systems which allow cooks to master frying foods and maintaining oil. It’s not difficult, says Elliot Jablonsky, research and development chef for 57-unit Buffalo Wings & Rings, but too many ignore the basics.
“To do it right takes far more attention and care than some understand or realize,” Jablonsky says.
Monitor oil temperatures
Correct frying oil temperature is crucial, especially in busy periods. The constant addition of cold food to the oil can drop its temperature by 50 degrees or more if it is not allowed to recover between cooking cycles. Cooled oil won’t cook properly and will leave food greasy.
Landgarten’s crews are constantly checking frying oil temperature manually to ensure it’s reheated and ready. Thermostats, he observes, are sometimes inaccurate too.

Keep the oil clean
Oil cleanliness comes next. The pristine golden color of fresh oil won’t last long if it’s not cared for during and after service. Breaded items are particularly harmful to frying oil condition since crumbs inevitably fall off as food cooks. To reduce fall-off:
- Bread items to order or at least not far in advance. When breaded in advance, coatings become soggy, necessitating a second application of crumbs. The second coating won’t stick as well as the first, and fall-off occurs.
- Once breaded, shake off excess crumbs into a breading drawer, onto a sheet pan or into a garbage can before adding to the fryer.
- Once cooked, remove food from fryer baskets before seasoning.
- Where possible, skim away bread crumbs floating on the surface of the oil after cooking.

Batter frying requires different techniques, some of which focus on safety. Katie Payne, chef-instructor in the culinary arts program at Sullivan University in Louisville, Ky., says new students tend to wince a little when learning the proper drag-and-release method of batter frying.
“A common mistake by rookies, who are intimidated when they get their hands close to the heat, is to drop the food in, which splashes the oil,” Payne says. “We teach them to give it a chance to sort of swim by lowering it by hand into the oil and floating it.”
Other batter frying tips:
- The colder the food and its batter, the better the fried result.
- When pulling food from the batter, allow as much as possible to drip back into the batter pan instead of the fryer.
- Do not place battered items into a fry basket and lower it. “The batter basically welds itself to the basket,” Payne says. Swirl gently in the oil for a few seconds and let go.
- Once the food is fried, remove it from the basket before seasoning.
- When possible, use a spider to skim floating batter bits from oil.
Cleaning and filtration
Oil cleanliness is essential to proper frying, but filtering it is often the most disliked job in a kitchen. The old method of draining fryer wells into metal stock pots fitted with sieves and filters still happens, and accidents resulting from this method aren’t uncommon.
Thankfully, advances in self-filtering fryer and oil replenishment systems have streamlined the process to a completely safe push of a button. Less advanced options utilize a vacuum wand to draw oil out of the well and filter it for return to the fryer or transport to a recycling container.
Landgarten uses self-filtering equipment, but he preserves his frying oil on the front end by frying all his foods twice: first in the oldest oil in his bank of fryers, and then finishing it in a fryer with clean oil. The first cycle sets the coating on the food, he says, “and then it’s moved immediately to the next fryer to finish. We’re reducing the amount of crumbs falling into the fresh oil and extending its life.”
Frying foods isn’t as complicated as other cooking methods, but it takes diligence and attention to detail to make any deep-fried indulgence the best it can be.
Looking for more inspiration?
 See our infographic to check out more tips for maintaining frying and cooking oils. Or download our Vegging-Out White Paper, to learn what consumers expect from meatless meals plus fresh ideas for adding vegetable-centric items to your menu.


